Build Your Own Retro Synthesizer Setup

In 1970, the price of a professional-grade synthesizer could easily exceed the cost of a new car. Today, the analog revival has changed the economic reality of music production, making high-quality vintage-style hardware accessible to hobbyists and professionals alike. This guide breaks down the technical components, the gear requirements, and the historical context needed to build a functional retro synthesizer setup from scratch.
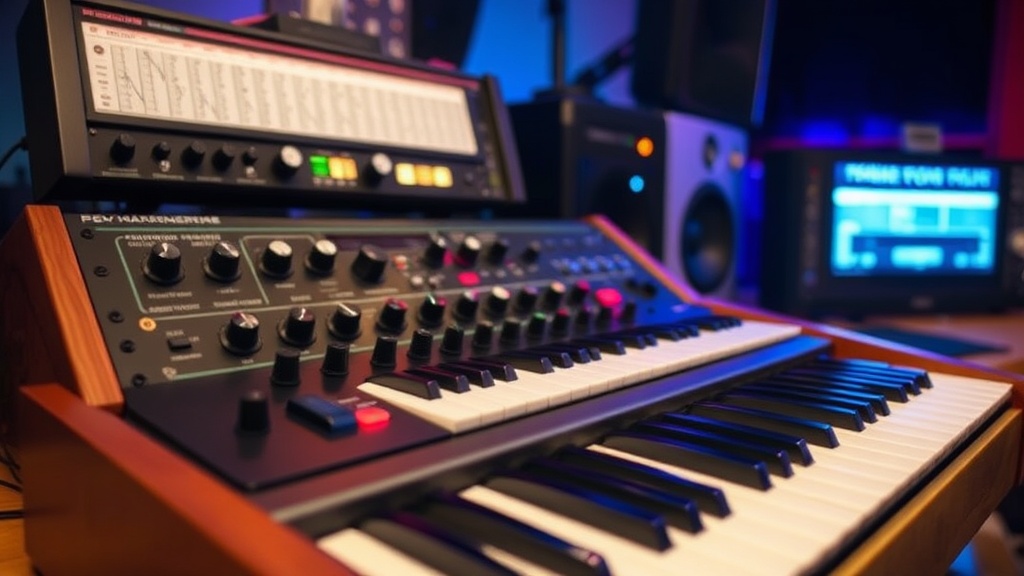
What Do You Need to Build a Retro Synth Setup?
You need a central sound source, a method for signal routing, and a way to record the audio output. A complete setup requires a synthesizer (analog or digital), a way to control pitch (like a MIDI keyboard or sequencer), and an audio interface to connect the gear to your computer. If you're aiming for a truly authentic vintage experience, you'll want to prioritize hardware that mimics the voltage-controlled oscillators (VCOs) of the late 1970s.
First, consider your sound source. You have two main paths: a standalone hardware synthesizer or a software-based setup using a MIDI controller. If you want the tactile feel of knobs and sliders, go hardware. If you're on a budget, a high-quality MIDI controller paired with a VST (Virtual Studio Technology) plugin is a great way to start.
The core of a retro setup is often a subtractive synthesizer. This method uses oscillators to create complex waveforms and then uses a filter to "subtract" certain frequencies. It's the foundation of the sounds heard in early electronic music. You might look at the subtractive synthesis method used by legendary machines like the Minimoog.
Here is a breakdown of the essential components:
- The Sound Engine: This is your primary synthesizer. It could be an analog powerhouse like the Moog Grandmother or a more modern, digital-analog hybrid like the Behringer Neutron.
- The Controller: A MIDI keyboard or sequencer. This tells the synth which notes to play.
- The Audio Interface: This converts the analog signal from your synth into a digital signal for your computer. The Focusrite Scarlett series is a reliable standard here.
- The DAW: Digital Audio Workstation. This is where you record and arrange your sounds. Programs like Ableton Live or Logic Pro are the industry standards.
How Much Does a Retro Synth Setup Cost?
A basic entry-level setup typically costs between $500 and $1,000, while a professional-grade vintage-style rig can exceed $5,000. The total cost depends entirely on whether you choose to invest in physical hardware or rely on software-based solutions. There's a massive spectrum of pricing in this hobby.
Let's look at three different tiers of investment. I've categorized these based on the "vibe" they provide and the initial outlay required.
| Tier | Primary Gear Example | Estimated Cost | Best For |
|---|---|---|---|
| Budget/Software | Arturia MicroLab + Ableton | $150 - $300 | Beginners and travelers |
| Mid-Range/Hybrid | Korg Minilogue XD | $600 - $800 | Hobbyists wanting real knobs |
| Pro/Analog Enthusiast | Sequential Prophet-6 | $2,000+ | Studio professionals |
If you're just starting, don't feel pressured to buy a $2,000 synthesizer immediately. Honestly, most of the legendary sounds from the 80s can be emulated quite well through software. You can find incredible emulations of the Roland Juno-106 or the Jupiter-8 within various plugin suites. Start small, learn the signal flow, and then upgrade your hardware as your ears develop.
One thing to keep in mind—hardware is an investment that holds value better than software. A well-maintained analog synth often retains a significant portion of its resale value, which is a nice safety net for your wallet.
How Do You Connect Hardware to a Computer?
You connect hardware to a computer by running the audio output of your synthesizer into an audio interface, which then connects to your computer via USB. This chain ensures that the analog signal is converted into a digital format that your computer can actually "read" and record.
The process follows a specific signal path. It's a linear progression from electricity to data. If you skip a step, you'll likely end up with silence or, worse, a loud pop that could damage your speakers. Follow these steps to ensure a clean connection:
- Plug the Output: Take a 1/4-inch instrument cable from the "Output" or "Send" jack on your synthesizer.
- Connect to Interface: Plug the other end of that cable into an input on your audio interface (like a Focusrite Scarlett 2i2).
- USB Connection: Connect your audio interface to your computer using the provided USB cable.
- Software Setup: Open your DAW and go to the audio settings. Select your interface as the "Input Device."
- Record: Create a new audio track, set the input to the specific channel you used, and hit record.
A common mistake? Plugging the synth directly into the computer's microphone jack. Don't do that. The signal level from a synthesizer is much higher than a microphone signal, and you'll likely get a distorted, unusable mess. Always use a dedicated interface to maintain the integrity of the sound. It's a small detail, but it makes a massive difference in the quality of your recordings.
If you're using a MIDI controller rather than a synthesizer, the process is slightly different. You'll use a USB cable to connect the controller directly to the computer. The computer then sends "instructions" (MIDI data) to your software, telling it which notes to play. The actual sound is generated by the software, not the controller itself.
"The soul of an analog synthesizer isn't in the precision of the notes, but in the beautiful imperfection of the voltage fluctuations."
That's why people still hunt for vintage gear. The slight drift in pitch—the way the oscillators fight each other—creates a sense of life and movement. In a world of perfect digital timing, these "errors" are what make the music feel human. Whether you're using a Behringer Model D or a high-end Moog Matriarch, you're chasing that organic, unpredictable warmth.
If you're interested in the technical side of how these waves are actually generated, the Britannica entry on synthesizers provides a deep dive into the physics of electronic sound. It's fascinating stuff if you want to understand why a square wave sounds "hollow" compared to a sawtooth wave.
Building a setup is a continuous process of experimentation. You might start with a single synth and a laptop, then realize you need a dedicated sequencer to handle complex patterns. Or you might find that your current interface lacks enough inputs for the modular gear you're dreaming of buying next month. There's no single "right" way to do this—only the way that sounds best to you.
One thing to watch out for is "latency." This is the delay between when you press a key and when you actually hear the sound through your computer. If your computer is slow or your buffer size is too high, it can make playing a keyboard feel like you're playing through molasses. If this happens, try lowering your buffer size in your DAW settings or using a more powerful computer.
The joy of the retro synth-building process is the hunt. It's about finding that one specific piece of gear that completes your sound. It might be a specific filter, a quirky sequencer, or a vintage drum machine. Keep exploring the gear forums, check the used markets, and most importantly, keep making noise.
Steps
- 1
Select Your Core Oscillator
- 2
Connect Your Voltage Controlled Filters
- 3
Route Through an LFO for Movement
- 4
Test Your Signal Chain